Overview
With Cloud Retailer, you can create content that can be delivered at the point of sale on the customer-facing screen. This content can be as simple as presenting a logo or as complex as displaying a video. Our recommendation for the average user to create really great-looking content easily is to cheat a little; we allow you to use Microsoft PowerPoint, a very simple, well-used tool for creating presentations to build your content.
Procedure
Here's what you need to do:


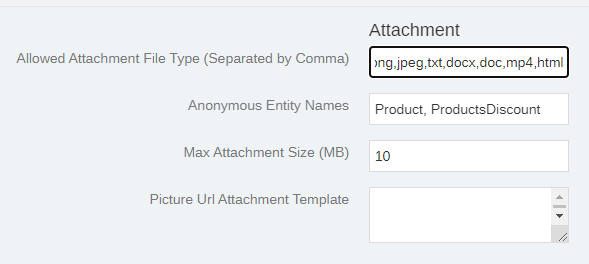
3) Navigate to Admin > Admin Catalog > Global Entity Settings > Attachments and add mp4 and html to the list of Allowed Attachment File Types. For Example:
4) Navigate to Admin > Global attachments and select ★ Add new attachment. Select the mp4 video file you made earlier and click Open. Select Save in the top right hand corner.

5) Check the Allow anonymous access box and select Pos in the drop down menu. Right click the link to the attachment you just uploaded and select Copy link address. Paste this link in a Notepad or txt file as we are going to need it later.
6) Open another Notepad, paste the text below into it and replace the text YOUR_VIDEO_URL_HERE with the address captured in step 5. Make sure to only replace the YOUR_VIDEO_URL_HERE text without removing the quotations.
<!DOCTYPE html>
<html>
<head>
  <meta http-equiv="X-UA-Compatible" content="IE=edge">
  <title>The video</title>
  <style>
    body {
      margin: 0;
      padding: 0;
      height: 100vh;
      display: flex;
      align-items: center;
      justify-content: center;
    }

    video {
      height: 100%;
      width: 100%;
      object-fit: contain;
    }
  </style>
</head>
<body>
  <video controls autoplay loop>
        <source src="YOUR_VIDEO_URL_HERE" type="video/mp4">
    Your browser does not support the video tag.
  </video>
</body>
</html>a) To save the file with a .html extension replace .txt with .html and select save:


9) Your new page is now properly added and you can follow the steps outlined in our Configuring a Customer Display article to display this content on a customer facing display.
References
Average Time to Complete
40 minutes
Was this article helpful?
That’s Great!
Thank you for your feedback
Sorry! We couldn't be helpful
Thank you for your feedback
Feedback sent
We appreciate your effort and will try to fix the article